Enter the world of fashion and costume design with this useful die to help you create unique and personalized belts and so much more. This die is designed to create easy and professional looking belt ends from a wide variety of materials including vinyl, leather and faux leather. Whether you’re using ribbons, piecing together scraps or finishing needlepoint, this die is a quick and easy answer to for making fashionable accessories in a flash.
AQ Cutting Mat Required: GO! Cutting Mat, 6 in. x 12 in. (15.2 cm x 30.4 cm)
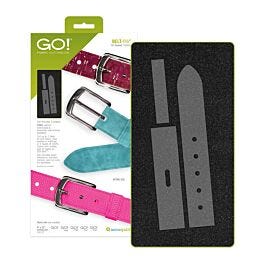
How to Die Cut Belt:
For best cutting results, position fabric on the lengthwise grain (straight of grain) as it goes under the roller.
- To cut one Belt:
- Cut a 10 1/2" x 3 3/4" rectangle out of cork, leather, or other material. Place over all shapes and cut 1 of each.
- Cut a 10" x 2" rectangle out of same material and cut another Strap End.
Why Quilters Love GO! Belt-1½" Die:
- Buckle up for some new projects with the GO! Belt-1½" Finished die; perfect for your next DIY gift. This die is not only for making stylish belts but for making other fashionable statements by adding to shawls, purses, and costumes. Step outside the box by attaching each end to any project like totes, bags, cases and more for a closure!
- GO! Belt is a DIY (“do-it-yourself”) Project die. These are popular shapes of projects that you make for yourself, to give gifts or to sell.
- GO! Belt works with a single prong belt buckle with a 1½" wide interior opening and a 1½" wide strip of trim, fabric, leather or any desired material.
- GO! Belt is designed to add strip ends allowing you to create any desired belt length.
- Make a stronger belt by sewing 2 identical shapes wrong sides together, place interfacing between layers or adding grommets to Strap End holes.
- No templates required! The GO! Belt die includes three shapes that are difficult or time consuming to cut by hand.
AccuQuilt Benefits:
- Cut so much more fabric in less time.
- Get accurate cuts every time -- No slipping rulers or mistakes
- Easiest to use -- Simply place die on cutter, then fabric and cutting mat on top
- Save fabric with Two Tone Foam -- Get more out of your fabric by placing it only over the shape you want to cut.
- Safe to use -- No blades come anywhere near your fingers
Die Tips:
- With some fabrics, after cutting, a thread or two will remain where die blades meet. Snip threads with scissors.
- Blades on some dies are positioned at an angle. Align fabric to edge of shape, not edge of die board.
- Use good quality fabric to reduce fabric stretch.
- It's always a good idea to test cut one shape before cutting many shapes to ensure fabric orientation is correct.